Planting Specific Tasks
Workingfarm automatically creates Seeding task and if the Planting Type includes transplanting then adds Transplanting tasks. Adding other planting specific tasks is easy and convenient.
Planting Details
Add Multiple Tasks at One Time
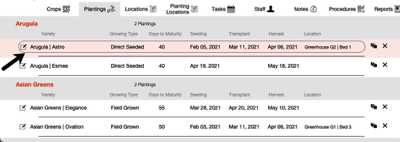
1. Click on a Planting to open the Planting Details window.
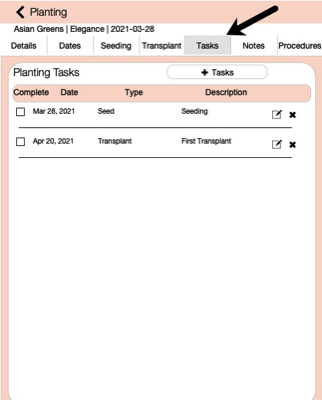
2. Click on Tasks tab. The two automatically added tasks are listed.
3. To add more planting specific tasks click on + Tasks button.
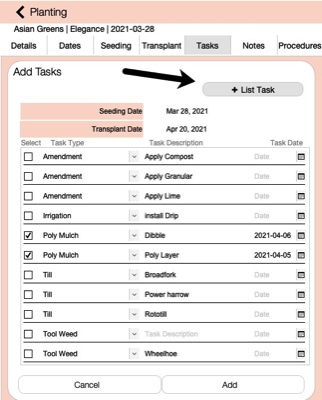
4. The Add Tasks window opens listing all currently added Optional Tasks.
5. Select the checkbox beside the tasks you want to add and enter a task date.
6. If there is a specific task that is not in the list, click on the + List Task button to add another row to the list. Fill in the specifics for that task.
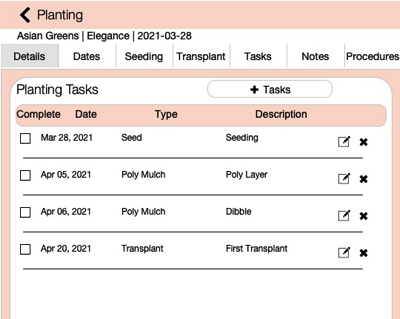
7. Click the Add button at the bottom to add the tasks and return to the Task tab. The newly added tasks appear in the list.
8. Click on the Edit button to change the details of that specific task.
Task Details
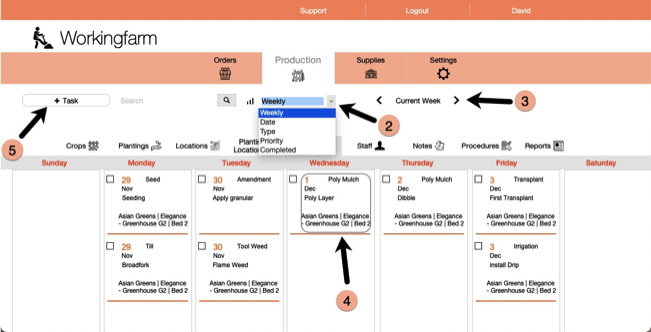
Task Window Options
1. Click on the Task tab on Functions bar to open the Task Weekly Schedule window which is the default veiw.
2. Change task views using the Task View drop down menu. The other options provide list views of all tasks within the selected Date Range.
3. The Task Weekly Schedule window allows you to see weekly tasks for Previous Week, Current Week and Next Week using the left and right arrows.
4. Edit a specific task by clicking on the Task Edit button.
5. Add a new task by clicking on the + Task button.
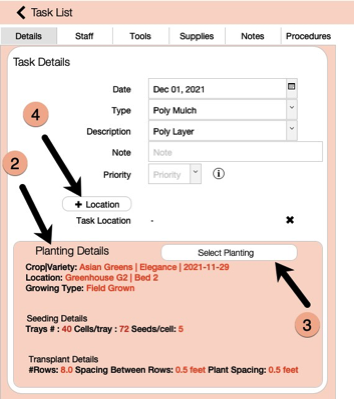
Edit Task Details
1. Click on the Edit Task button for a specific task to open the Task Details window.
2. Tasks which were created for specific Plantings, the planting information is automatically displayed in the Planting Details section. If you are creating a new task using the + Task button, then this section will be blank.
3. To select a specific Planting for the task click on the Select Planting button. Select the planting from the list.
4. Again if you are adding a new task you can also assign a specific Location to task using the + Location button. The location added here is specific to the Task and not associated with any Planting you may have choosen.
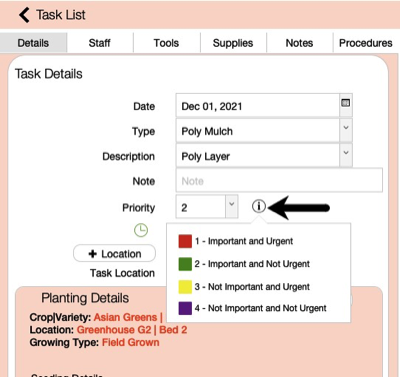
Assigning Priority
Assigning priorities to tasks is using in the Task List view sorts. Those with priorities are listed first and are colour coded according to their priority.
1. From the Task List window using Date view option, click on any Task.
2. Task Details window opens. Click on the information icon beside the Priority list to get a explanation of the priority numbers and colour coding. Select a Priority number.
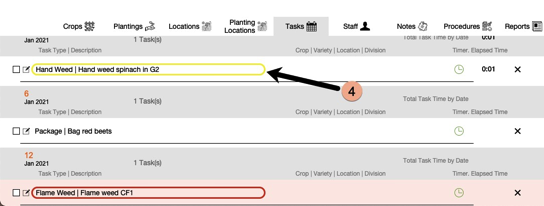
3. Click on to left < Task List button.
4. Task List will display this Task with yellow colour coding and sorted first by date.
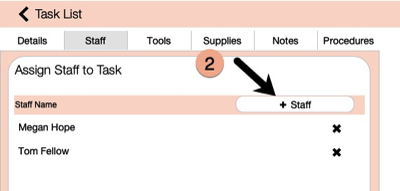
Assign Staff
1. Click on the Staff tab.
2. Click on the Assign Staff button to open the Staff List window. This lists all the people you have added using the Staff tab and + Staff button.
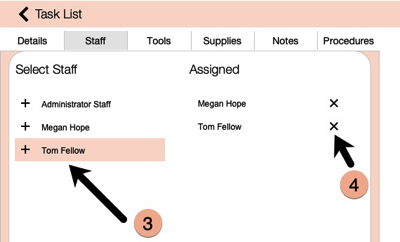
3. Click on the Staff names you want added to the task.
4. Remove Staff by clicking the Delete icon.
5. Click Done button to return to Assign Staff window.
Assign Tools
1. Click on the Tools tab.
2. Click on the Assign Tools button to open the Staff List window. This lists all the tools you have added on the Supplies tab using the + Tools button.
3. Click on the Tool names you want added to the task.
4. Remove Tools by clicking the Delete icon.
5. Click Done button to return to Assign Tools window.
Assign Supplies
1. Click on the Supplies tab.
2. Click on the Assign Inputs button to open the Supplies List window. This lists all the purchased supplies you have added on the Supplies tab using the + Supplies button.
3. Click on the Input name you want added to the task. and enter Quantity applied.
4. The Quantity column will automatically calculate remaining inventory.
5. Remove Inputs by clicking the Delete icon.
6. Click Done button to return to Assign Supplies window
Tracking Time Spent on Task
1. Go to Task List view by either Date or Type.
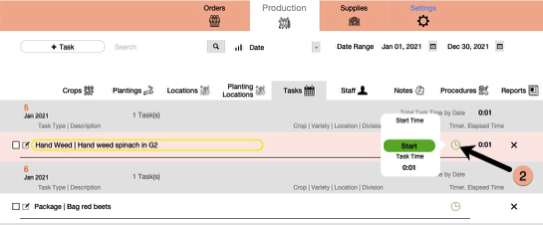
2. Click on Timer icon to open the Timer window.
3. Click on Start button to start timer.
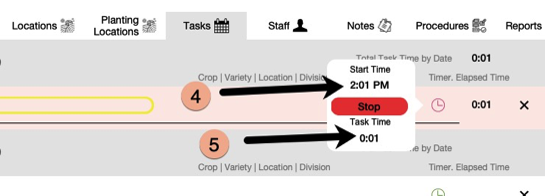
4. The Start Time appears with current time, the button will display red Stop button.
5. You can start and stop the timer as many times as you want and the total time will display under Task Time.