Getting Started with Building Your Planting Plan
Workingfarm comes with several sample data records. It is your choice whether you delete these records or edit them to contain the data you want. Lets get started.
Crops
Crop List and Associated Varieties
1. From the Dashboard click on Production on the Features bar which automatically opens the Plantings window.
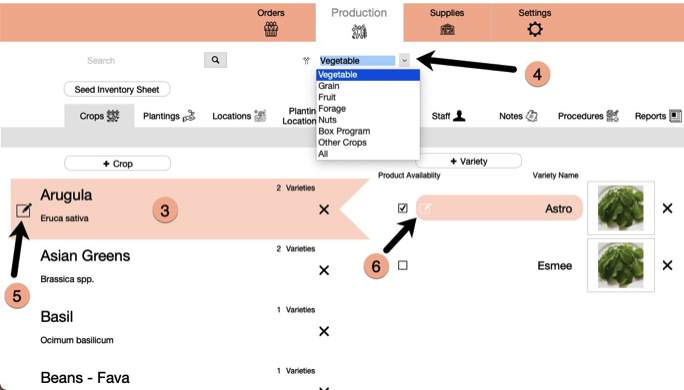
2. Click on Crops tab which opens the Crops List window.
3. Click on a Crop name on the left and it will display all associated Varieties listed on the right.
4. Change the Crop type by clicking on a View List drop down option.
5. Open the Crop Details window by clicking on Edit icon to left of the crop name.
6. Open the Variety Details window by clicking on Edit Variety button.
Plantings
View Planting List Options
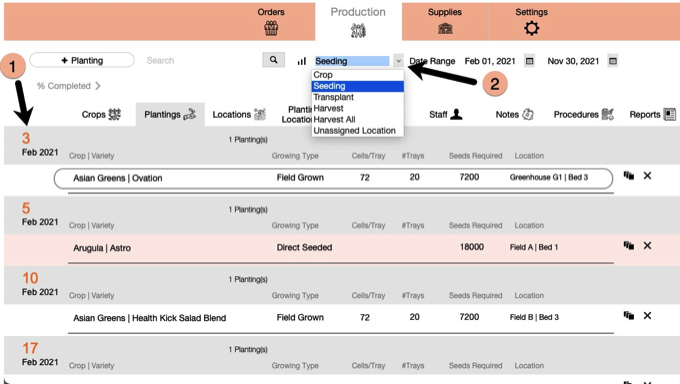
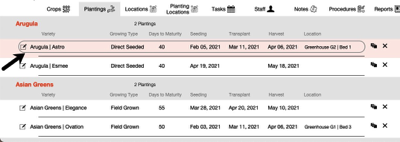
1. Click on the Plantings tab on Functions bar to open the Plantings list by Seeding date which is the default veiw.
Plantings are defined by three elements: Crop Name | Variety Name | Seeding Date. For example: Arugula | Astro | Mar 21, 2022
2. Change the View list option to Crop. This lists all plantings for each Crop.
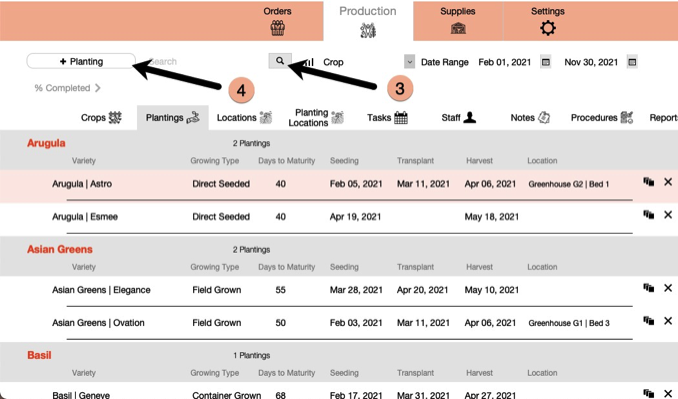
3. Use the Search feature to find plantings by Crop Name, Variety Name, or Location of where it is planted.
Add New Planting
4. Click on the + Planting button to add a new planting. This opens the Add Planting window.
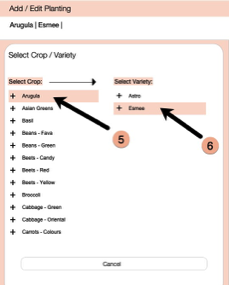
5. Select the Crop which will then display all assosciated Varieties to the right.
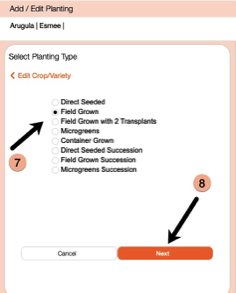
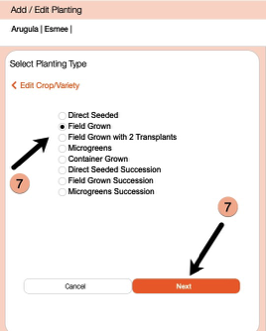
6. Select the specific variety for the planting. This automatically opens the Select Planting Type window.
7. Select the radio button for the Type which matches the planting you are adding.
8. Click Next button.
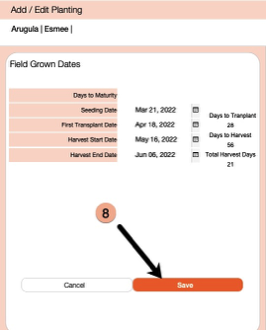
9. Add the dates for each of the items listed.
10. Click the Save button.
Edit Planting Dates
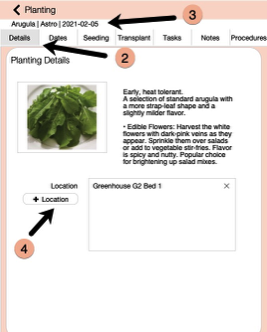
1. In the Planting List window, click on Edit Planting button any existiing planting to open Planting Details window.
2. From the Crop List window, Planting Details opens on the Details tab.
3. The Planting is always listed just above the Tab list.
4. Click on + Location button to select the location this planting will be located.
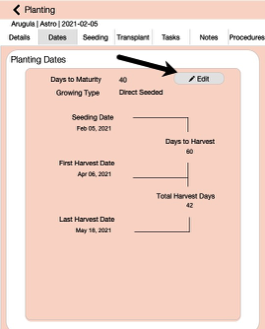
5.Click on Dates tab to view all current date selections.
6. Click on Edit button. Opens Planting Type selection window.
7. Select the Type you want. Click Next button.
8. Edit any of the Planting Dates. Click Save button. This process also creates a Seeding task on the seeding date and for planting types which require transplanting, a Transplant task on the transplant date.
Add Planting Details
1. In the Planting List window, click on any Edit Planting button to open the Planting Details window.
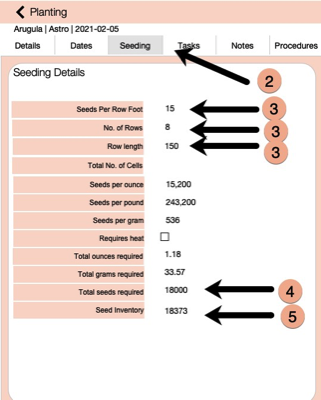
2. Click on Seeding on the Tab bar. With the Planting Type being Direct Seeded there is no Transplant tab. There will be one for all planting types which require a transplanting task.
3. Enter the values for the three specific Seeding fields, Seeds per Row Foot, No. of Rows and Row Length.
4. The Total Seeds Required for the planting is automatically calculated.
5. The Seed Inventory calculation uses Seeds in Inventory - Total Seeds Required for that planting. Seeds in Inventory always reflects the seeds remaining for that Crop | Variety.
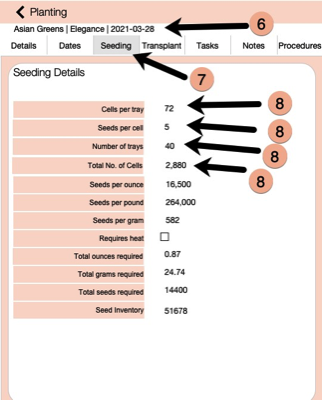
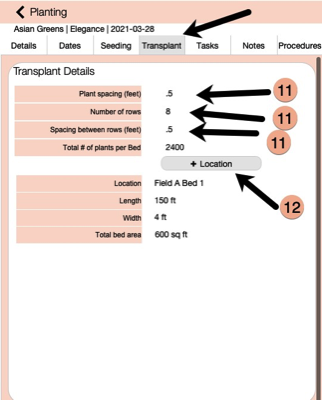
6. Open a Planting with the Planting Type which requires a Transplant task.
7. Planting name reflects name of planting being edited. Transplanting tab is now available on the Tab bar.
8. Seeding specific fields are different than for Direct Seeded planting type. This reflects seeding trays that will eventually require Transplanting task.
9. Click on Transplant tab.
10. Enter values for Transplant details.
11. Click on + Location and select the Location for this specific planting. You can use the Total # of Plants per Bed to compare to Total No. of Cells on Seeding tab to know if you are seeding enough trays.